PILOT ONLY
This is not available to normal instances but only too users of our
The Surf Research Data Connector App is a re-implementation of the ScieboRDS app. It allows Research Drive users to connect to research data repositories to upload their data to these repositories easily.
The following repositories are supported:
- OSF
- Zenodo
- Figshare
- Dataverse (Available from Feb 26th due to maintenance on the dataverse demo environment)
Besides uploading data to these repositories, the application also allows users to download private data from these repositories. It allows users to download open data from many different repositories supported by the Datahugger project.

Getting started
This tutorial will help you get started using the app.
All passwords shown in this wiki have been deactivated.
The app is located here in the menu as 'SRDC'.

Connecting the app to Research Drive
Connect automatically
The app will automatically connect to your research drive instance.

Once connected you will see the account you are connected to in the top left corner.

Connect manually
If for some reason the app does not connect automatically, then you can still connect manually.
Go to the Connect page by clicking the CONNECT link in the top menu.

To connect the app you will need to generate an application password. For this, click on your username on top right corner, then go to Settings → Security.

Fill out an app name and click the 'Create new app passcode' button.

Copy the username and password/token.

Fill out the login details and click Connect.

Once the app is connected you can start connecting to the different available services.
Connecting the repositories
To setup connections to your repositories, click on the YOUR CONNECTIONS button in the top right corner.

All services can connect using BASIC AUTH (with a username and password) and some services can also connect using OAUTH.
Connecting using OAUTH is the easiest way to connect, but not all download functionality is available when connecting this way.
If you want to download private datasets you will need to connect using BASIC AUTH.
Full upload functionality is available with both BASIC AUTH and OAUTH.
For downloading an open dataset you do not have to connect to any repository.
Figshare
Connecting using OAuth
Make sure you are logged in to your Figshare account. You can easily go to the repository by clicking the link 'Go to Figshare'.
Then come back and click on the 'Connect by OAUTH' button.

In the next screen click on the Figshare account you want to connect to.

Then click the 'Allow' button.

After that, you will be redirected back to the app and you should see the message: 'figshare connected'.

Connecting using Basic Auth
Click on 'Go to figshare'.

If you are logged in to Figshare, then in the right top corner click on your profile icon and then select Applications.

Scroll down to the 'Personal Tokens' section and click the 'Create Personal Token' button.

Fill out a description, click save, and copy the token.


Paste in the token and give yourself a username. Click connect.

If your connection is successful you will see: 'figshare connected'.

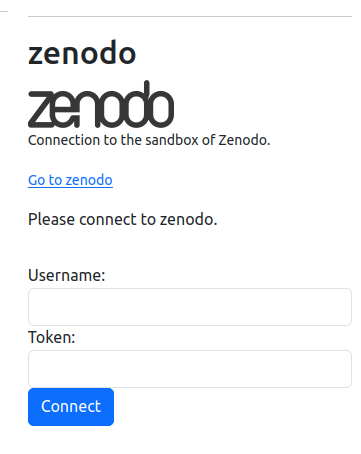
Zenodo
In the pilot we are connecting to the Sandbox version of Zenodo. Please note that the sandbox does not support ORCID authentication. It does support Authentication with Github and basic authentication with email.
Connecting using OAuth
Make sure you are logged in to your Zenodo account. You can easily go to the repository by clicking the link 'Go to Zenodo'.
Then come back and click on the 'Connect by OAUTH' button.

Click the 'Authorize application' button.
After that, you will be redirected back to the app and you should see the message: 'zenodo connected'.

Connecting using Basic Auth
Click on the 'Go to zenodo' link.
When you are logged in to Zenodo click on your profile in the top right corner and then click 'Applications.

Scroll down to the section 'Personal access tokens' and click 'New token'.

Fill out a name for your token and check all the scopes and press 'create'.

Copy the access token.

Fill in the token, and your username, and click 'Connect'.

If your connection is successful you will see: 'zenodo connected'.

OSF
Connecting using OAuth
Make sure you are logged in to your OSF account. You can easily go to the repository by clicking the link 'Go to OSF'.
Then come back and click on the 'Connect by OAUTH' button.
Click the 'Allow' button in the below screen.

After that, you will be redirected back to the app and you should see the message: 'osf connected'.

Connecting using Basic Auth
Click on the 'Go to osf' link.

Click on your profile icon in the top right corner and then select 'Settings'.

On the settings page select 'Personal access tokens' from the menu on the left side.

Click 'Create token'.

Set a token name, check all the checkboxes and click 'Create token'.

Copy the token.

Paste in the token, fill out the username, and click 'Connect'

If connecting was successful you will see: 'osf connected'.

Dataverse
Connecting using Basic Auth
Click the 'Go to dataverse' link.

When you are logged in go to your user menu in the top right corner and click 'API Token'.

Then click on 'Create Token'.

Copy the token.

Paste the token, fill out your username, and click 'Connect'.

If connecting was successful you will see: 'dataverse connected'.

Irods
Connecting using Basic Auth
Click the 'Go to irods' link.

When you are logged in, click your profile name in the top right corner and click on 'Data Access Password'.

Click on 'Generate new data access password'.

Fill out the label and click 'Generate data access password'.

Copy the token.

Paste the token, fill out the username, and click 'Connect'.

If connecting was successful you will see: 'irods connected'.

Sharekit
Connecting using Basic Auth

You can get an API key for Sharekit via the Sharekit service desk.
Fill out the username and the API key/Token.

If connecting was successful you will see: 'sharekit connected'.

Disconnecting repositories
When you are connected to a repository there will appear a 'disconnect' button below that repository on the Connect page. Click the corresponding 'disconnect' button to disconnect a repository.

Uploading data
This is what the upload page looks like if you have not yet connected to any repository.

If all the private repositories are connected the upload page will look like this:

Once you select the repository, the metadata fields will change to the fields specific to that repository.

Once you select the folder you want to upload and fill out the data press 'preview'.

The preview shows:
- connection status
- the folder content
- the metadata
You can press the 'back' button if you like to change something.
If all looks well you can press the 'Start Upload' button.
You will also need to check the 'Check to confirm start of upload.' checkbox to confirm you are sure you want to start the upload.

You can also check the 'Check to upload all files as 1 zipfile' if you want this. This is useful if you want to preserve the folder structure of your project exactly as it is. However, most services will create some sort of folder structure that will match your project's folder structure.
Once you clicked 'Start Upload' you will see the status of the upload process.

The status will continuously update until 'ready'.
In the below screenshot, you can see that one file failed to upload. This will be shown to the user, but will not halt the process.

You can only process one upload or download at a time.
Downloading data
There are two ways to download data:
- download open data using Datahugger
- download private data using one of the repository connectors
If you click through to the download page you will first see this:

If you already know that your data is private, then you can click ' I want to download a private dataset'. In any other case you can start here and provide a URL to the project you want to download, select a folder on your Research Drive to download the data to, and click 'Preview Download'
Example
Let's say we want to download data from this repo:
https://figshare.com/articles/dataset/Bitcoin_Prices_and_Technical_Variables/7445855
to /btcprices

This will be the preview.

As you can see we cannot preview the metadata of the project using this URL. We can if we use the DOI of this project.
The DOI can be found here:

Let's copy the DOI URL and use that.

This will provide us with more metadata information.

If everything looks good, you can start the download by checking the 'Check to confirm start of download' checkbox and clicking the 'Start Download' Button.

This is the full process of this download.

As part of the process, the files will be checked with checksums, and a metadata file will be generated.
History
On the history page, you will find a table with all your uploads and downloads.

If you click on the status ('ready') you will be taken to the full history of that specific download or upload.
Please note that the statuses are sorted ascending by timestamp.

If you click on the Local column ('btcprices') you will be taken to the folder on your Research Drive.

If you click on the link in the Remote column (if available) you will be taken to that linked external repo item.
FAQ
There is a FAQ page answering your Frequently Asked Questions. If you are wondering about what certain status messages actually mean, then you can find out more via this page.


Disconnecting the app
To disconnect the app go to the Connect page and click the 'disconnect' button in the Surf Research Drive section.
If you disconnect the Surf Research Drive all other connections will also be disconnected.

Known issues
- In the upload and download process, new (metadata) files are created, but in the final status message, these are not mentioned yet. Will fix.
- When connecting to Figshare using Oauth, the user first needs to be logged in to Figshare. If the user is not yet logged in the user will be redirected to the Figshare login page and will not be redirected back to SRDC. This behavior is managed by SRDC but by Figshare. Won't fix
- When downloading private data from dataverse the URL needs to be amended for it to work. The URL of the item to download can be https://demo.dataverse.nl/dataset.xhtml?persistentId=doi:10.80227/test-Q0VJQM&version=DRAFT. In order for the download to work you need to remove the version= part, like this: https://demo.dataverse.nl/dataset.xhtml?persistentId=doi:10.80227/test-Q0VJQM . Alternatively you can also use the provided doi.org URL: https://doi.org/10.80227/test-Q0VJQM. Will fix.